TABLE OF CONTENTS
Frame Descriptions
The most common place to enter text for your diagrams is the Frame Description section. You can double-click the white section directly below any frame of your diagram and you can enter your Frame Description. Use this area to describe the action taking place in each frame.

You will then see the Edit Frame Description box where you can write any text (including formatting options) that will show with that frame. In the example below, the bold text refers to positions, the underlined text refers to the actions made, and the text in italics are referencing an area on the floor.
There is also an option to edit the font color and/or the highlight color. To use this feature, highlight the text you'd like to format, then click either the front, lower box to change the text (foreground color) or the back, higher box to change the highlight section (background color). To clear the color formatting, you can highlight the text and a small "x" will show at the bottom, as shown below.

After you've entered your notes and pressed "OK" at the bottom, you'll now see that information on the Frame in your Play Editor Window. After using the FastShare feature, you will then see this information on the frame of this play on any other product, such as FastDraw Web and the FastScout mobile app.

Frame Labels
By default, Frame Labels will display as "Frame (x)" to allow coaches and players to follow the play from 1-4, or as many frames as needed within the play. You will be able to edit this by double clicking on the Frame Label, which will open the Edit Frame Label window. Here, you can rename the Label to anything you'd like. If it's already been edited, you can remove all text and hit "OK" and it will revert back to Frame (x) default.

For example, some coaches may use the Frame Label to show multiple options within a play. So, after a UCLA cut, there may be a Spain Option and a Stagger Option. These can both be shown in the same play and labeled as "Frame 2" with the option noted for clarity.
In a similar way, coaches may show different options against different defensive coverages. Some coaches may remove the entire "Frame (x)" section in a play and name each frame the action(s) being performed. For example, "Drag Screen with Spanish Action" and "Drag screen and Weakside Staggers".

Adding Text to the Court
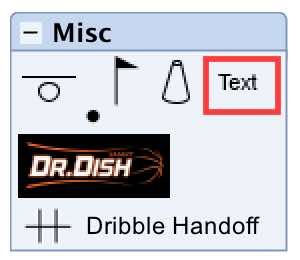
You can also drag the "Text" icon over from the stencil palette and add text directly onto the court. After dragging the text onto the court, a menu will open allowing you to type in the text value that you want on the court. Once you are finished, you can drag and rotate the text to any place on the court, just like a player or action stencil.

The Play Notes Section
A short notes section is available in the Play Editor window, just below the Play Name.

These notes do not automatically print in your playbook, but can be turned on from the Playbook Settings menu. Play Notes can be added to either the Play Title or Play Subtitle, which will appear above the frame.

Because of the limited space available in the Play Title and Play Subtitle areas, the Play Notes section is best used for very short notes. This might include a visual cue for the play call, for example, or the time of the game that the play was run. More extensive notes should be placed either in the Frame Descriptions, or in the Coaching Points section.
Coaching Points Section
For extensive notes that do not fit in the Frame Description area, the Coaching Points section can be used and added to any playbook. Full details on using Coaching Points can be found in the Coaching Points article.
